My Christmas dining room with DIY snowy centrepiece is so pretty! I can’t wait to show you.
Disclosure: This post may contain affiliate links. Please read my disclosure policy.
I’ve had this idea for a pretty snowy centrepiece for months but it’s even extra special today because it snowed all day yesterday and my kids even had a fun snow day!
This DIY snowy centrepiece looks just like real snow but obviously it’s not. Follow my tutorial below so you can see how I make this while protecting your dining room table from most of the mess.
Start with gathering your supplies. Lay down some of the snowy blanket cover (similar to quit batting). Lay on your table like a runner.
Cut the four corners of each aluminum tray to lay flat (best to do before glue unlike me).
Using glue or Mod Podge, coat entire baking trays especially the edges with a foam brush.
Add epsom salts all over the trays. I bought two big containers of epsom salts but I only needed one. Finish off with spreading the frosty/buffalo snow.
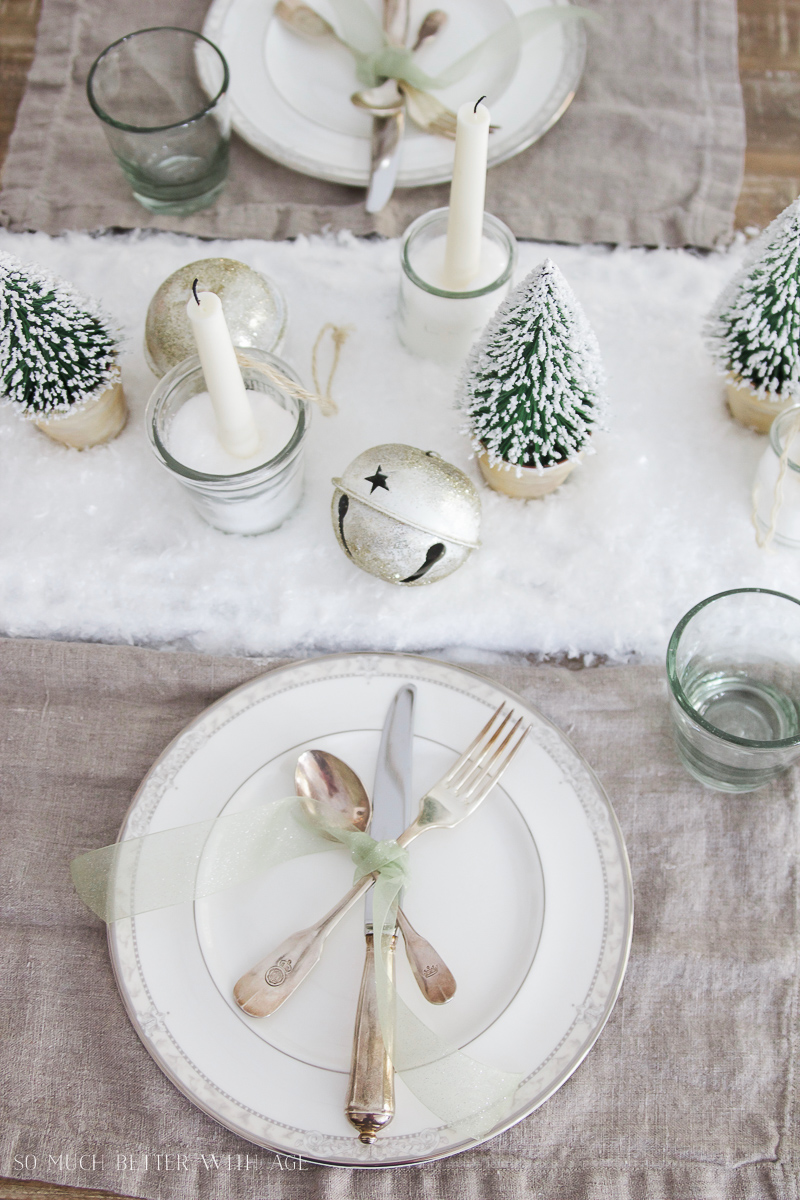
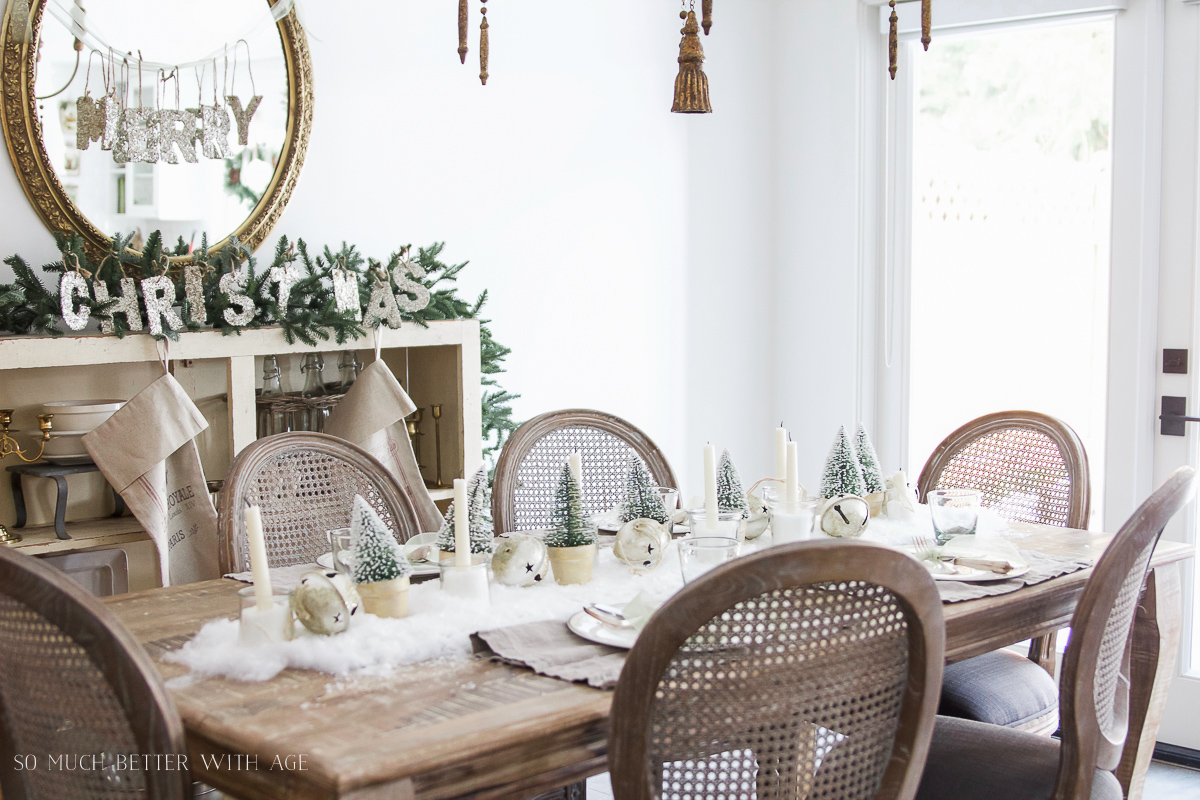
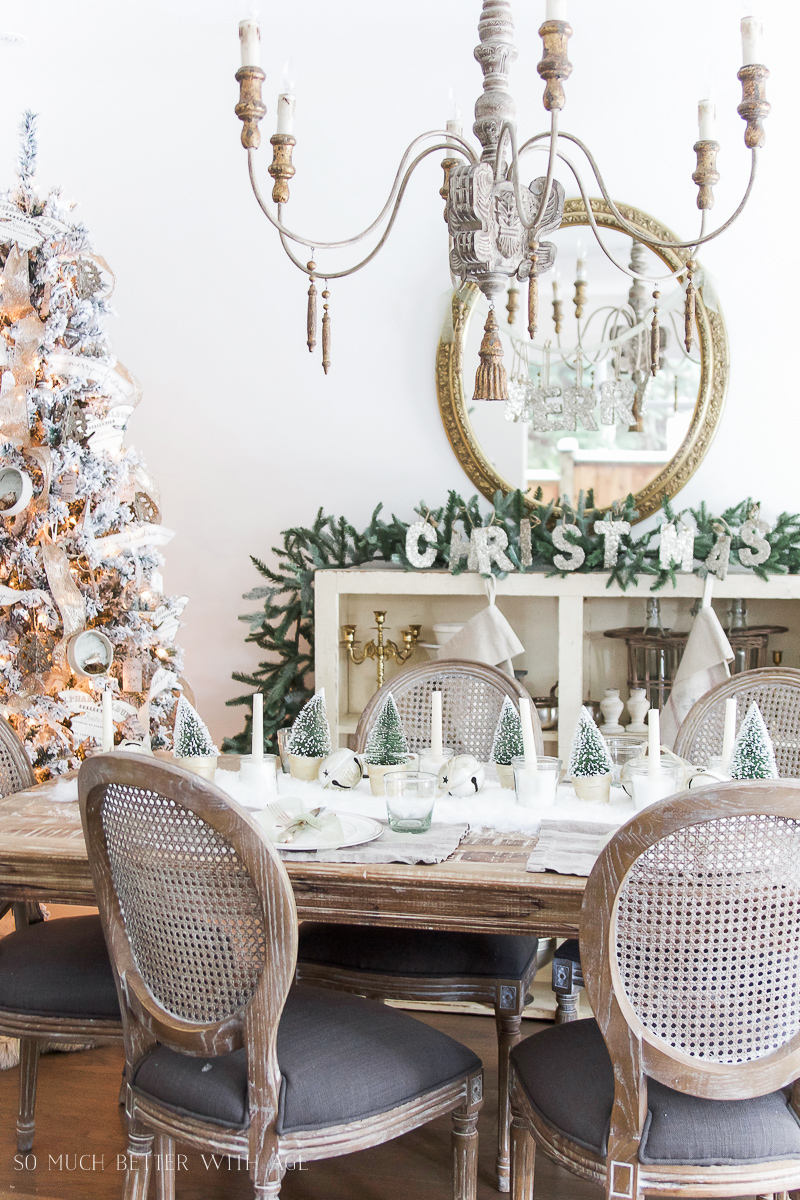
Stick in your bottlebrush trees, jingle bells, candles (I used my French yogurt jar candles) and you have a stunning snowy centrepiece.
And most importantly, your table is protected and will be easier to dismantle later on.
There is so much ‘snow’ that I love the way the candles sink into it to give it a real dramatic winter effect.
I love my china pattern but it is not made anymore, Royal Doulton Naples Platinum.
The glittery gold ‘Merry Christmas’ banner were letters I found at Michael’s same as the Noel letters I used.
I get a lot of questions about my French inspired dining room chairs. I bought them at a local furniture shop but I’ve sourced a few places to buy similar ones online.
What did you think of this snowy centrepiece? Let me know if you’ll try it in the comments below!
Making a spool and wool Christmas garland is easier than you think and adds a nice touch to your holiday decor! This pretty wood bead garland is on all the Christmas tree photos I’ve taken recently, and is so easy to make! You can use it for your Christmas tree or anywhere around your house….
I will show you how I decorated my dining room and table for Christmas this year with mixes of different plaids. Decorating with plaids has been so fun this year! I started with my mantel, then the rest of my living room, the kitchen and today I’m showing you my lovely table setting in the…
HEre is More Christmas decor I’ve found with a vintage feel! I found more Christmas decor with a vintage feel so I had to share! If you haven’t seen the first one, click here for Christmas Decor with a Vintage Feel. Let’s get into the items I’ve found! More Vintage-Like Christmas Items Natural and rustic…
Be sure to check out this year’s vintage Christmas tour that is full of holiday inspiration! I’m so excited to share with you today my stunning Christmas home tour! It’s challenging and exciting every year to do Christmas decorating a little bit different using the same decorations I have from each and every year. No…
Take the stress out of decorating for Christmas with this easy Christmas garland! Here’s a super quick and easy Christmas DIY project to spruce up your house with – an easy Christmas garland! The minimal supplies are stuff you will probably have on hand and it should only take a few minutes to put together….
I decorated my dining room for spring with simple touches of gold and shades of green. Let me show you how. Green has always been my favourite colour and adding natural greenery is such a great way to incorporate shades of green into any space. The touches of gold really add to the ambience in…
53 Comments
So very pretty a perfect snowy scene, I love the idea of using Epson salts to hold candles, so smart!
That idea of metal trays for the centrepiece is genius! I always wondered who would dump a bag of salt on their table. The clean-up would be insane!
Not only is the stunning, but it’s smart design. Well done!
p.s can we talk about that tree?!
Oh wow, Jamie! This whole room is simply stunning. You do French country so perfectly. And what a great idea to do the DIY snowy runner! Thanks so much for sharing all of the inspiration!
Okay, so my jaw may have dropped just a little when I saw your dining room. So, so very pretty! Can you come decorate my house? Wishing you a very merry Christmas!!
So love your style and taste for Christmas decor! The tablescape is so delightful! Just curious why several of the links have a strike/through line through them?
Thank you so much, Thea!! If the link isn’t working in WordPress, it puts a strike through the URL so you know it needs fixing. Although lately sometimes even when the link is fine, there’s a strike through. So annoying lol. Happy holidays!
Hugs, Jamie
Oh, I love that snowy centrepiece Jamie and so lovely that you had snow outside too.
Thank you for sharing your DIY snowy centrepiece and beautiful dining room at Create, Bake, Grow & Gather this week. I’m delighted to be featuring them at tomorrow night’s party and pinning too.
Happy New Year!
Kerryanne
HI! This is soooooo amazing! Just so I am clear, the flat metal trays are on top of the batting? And then you do the glue on the trays with epson salt and snow?
We use cookies to ensure that we give you the best experience on our website. If you continue to use this site we will assume that you are happy with it.


So very pretty a perfect snowy scene, I love the idea of using Epson salts to hold candles, so smart!
Thanks so much, Laurie!
Hugs, Jamie
Gorgeous centrepiece and table setting!!!! Stunning!
Thank you, Rebecca!
Hugs, Jamie
my jaw literally hit the floor when I scrolled to your centerpiece – so stunning! I love how simple, but totally elegant it is.
Aww, thanks so much Heather!
Hugs, Jamie
hey girl love the centerpiece!
Thank you Shawnna!
Hugs, Jamie
Jamie, I love this space. You have such a knack for styling, and your Christmas decor is a testament to that. That tree! I love it!
You’re too kind, Tara! Thanks so much.
Hugs, Jamie
I’m completely obsessed with your dining room table and chairs. And that chandelier! Seriously, so gorgeous!!
Aww, thanks Thalita! Love your tour too! Happy holidays!
Hugs, Jamie
That idea of metal trays for the centrepiece is genius! I always wondered who would dump a bag of salt on their table. The clean-up would be insane!
Not only is the stunning, but it’s smart design. Well done!
p.s can we talk about that tree?!
Right??!? haha Thanks Ariel! I saw you at Haven but never got a chance to say hi to you. Let me know if you’re going this year.
Hugs, Jamie
This is a perfectly snowy scene! I love the winter wonderland feel! Merry Christmas!
Thanks Jen! Happy holidays.
Hugs, Jamie
Oh wow, Jamie! This whole room is simply stunning. You do French country so perfectly. And what a great idea to do the DIY snowy runner! Thanks so much for sharing all of the inspiration!
Aww thanks Christina! Thanks for inviting me. Happy holidays!
Hugs, Jamie
I wanted to pin every single picture.
Perfection!!
Merry Christmas 🙂
~Shannon
Thank you Shannon! Happy holidays!
Hugs, Jamie
Gorgeous! That centerpiece looks like a beautiful snowy forest I want to live in. Lovely!
Me too! Thanks Becki! Happy holidays!
Hugs, Jamie
Okay, so my jaw may have dropped just a little when I saw your dining room. So, so very pretty! Can you come decorate my house? Wishing you a very merry Christmas!!
Awww, thanks Shauna!! Happy holidays!
Hugs, Jamie
Oh my goodness this snowy centrepiece is out of this world. Amazing! Jamie – I love it – gorgeous and brilliant!!
Thanks so much, Krista! Happy holidays!
Hugs, Jamie
This is gorgeous! Thanks for posting the tutorial. I’m gonna make some snow!
YAA! So glad I’ve inspired you. Happy holidays!
Hugs, Jamie
So love your style and taste for Christmas decor! The tablescape is so delightful! Just curious why several of the links have a strike/through line through them?
Thank you so much, Thea!! If the link isn’t working in WordPress, it puts a strike through the URL so you know it needs fixing. Although lately sometimes even when the link is fine, there’s a strike through. So annoying lol. Happy holidays!
Hugs, Jamie
Your table is beautiful. Love the snowy Christmas look, and your tutorial is awesome. Let it snow, looks so great.
Thank you so much, Danielle! Hope you have a wonderful holiday this year.
Hugs, Jamie
Love your dining room and the tablescape is gorgeous… Happy Christmas!
Thank you so much, Kim! Happy holidays to you and your family.
Hugs, Jamie
Your dining room looks absolutely gorgeous! And I really want to make that snowy centrepiece. It’s a fabulous idea!
Thanks so much, Joann. Merry Christmas!
Hugs, Jamie
This is a gorgeous tablescape and such a creative centerpiece idea! Loved every single detail! xoxo
Thank you so much, Laura. Merry Christmas.
Hugs, Jamie
Your blog is beautiful, merry christmas.
Thank you so much! Merry Christmas
I loved your blog
Thank you, Rosangela.
Hugs, Jamie
This blog is too beautiful, congratulations
Thank you, Rafael!
So pretty! I love all the white. 🙂 Stopping by from the Scoop link up.
Thanks Jenny!
Hugs, Jamie
This is so pretty and easy to do. This would look amazing in my home as its all decorated in white. Thank you for the inspiration.
Thanks so much, Leanna!
Hugs, Jamie
Very beautiful snowy decor. You have a lot of talent for it. That tree was wonderful! I loved!
Oh, I love that snowy centrepiece Jamie and so lovely that you had snow outside too.
Thank you for sharing your DIY snowy centrepiece and beautiful dining room at Create, Bake, Grow & Gather this week. I’m delighted to be featuring them at tomorrow night’s party and pinning too.
Happy New Year!
Kerryanne
Thank you so much, Kerryanne! I hope you had a wonderful Christmas with your family this year. Happy New Year!
Hugs, Jamie
HI! This is soooooo amazing! Just so I am clear, the flat metal trays are on top of the batting? And then you do the glue on the trays with epson salt and snow?
Sorry for the delay, yes that is correct! Many different ways you could do it. Happy New Year!